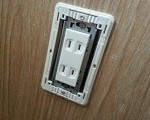
青色7セグLEDを買ってみた。BQ-N51BJRD これね。
で、今日はこっちを参考につくってみた。
http://garretlab.web.fc2.com/arduino/introduction/beginning_with_7segment_led/index.html
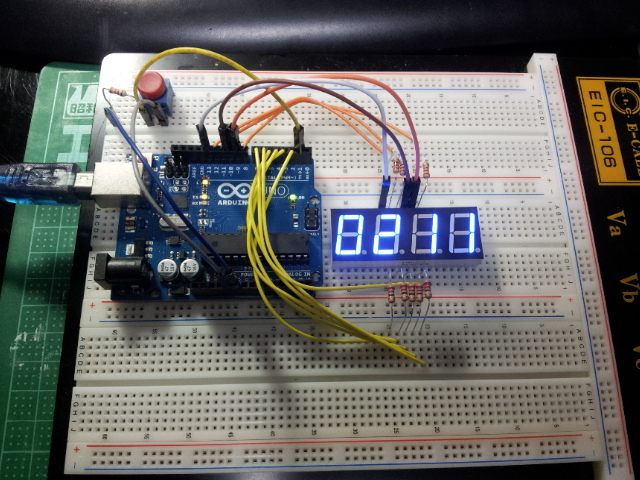
最初はコピペで動作を確認。
覚えた気になってるので全部クリアして自分流に作り直してみる。
あかん、まったく違うものができてるwww
ま、最終的には高度で便利なライブラリのお世話になるんだけど勉強のためにね。
■今日のエラー
const int と int の違いがわからず const int を使っていた。
const がつくと数値が固定されるってことね。
const int counter;
なんてやったためにカウントされなかったw
#include // http://www.arduino.cc/playground/Code/Debounce
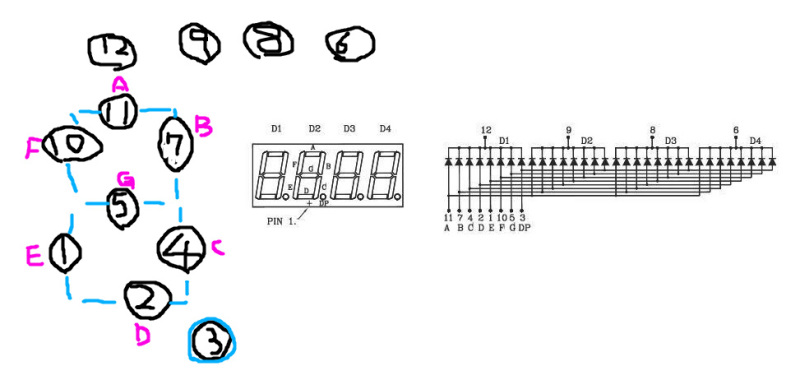
const int cathord[]={ 13, 10, 9, 7};
const int digseg[]={ 12, 8, 5, 3, 2, 11, 6 };
const int digits[] = {
0b00111111, // 0
0b00000110, // 1
0b01011011, // 2
0b01001111, // 3
0b01100110, // 4
0b01101101, // 5
0b01111101, // 6
0b00100111, // 7
0b01111111, // 8
0b01101111, // 9
};
int count=0;
int buttonState = 0; // variable for reading the pushbutton status
const int buttonPin = 1; // the number of the pushbutton pin
Debounce sw_red = Debounce(30, buttonPin);
void setup(){
for( int i=2;i<=13; i++){
pinMode(i,OUTPUT);
}
for( int i=0;i<4; i++){
digitalWrite( cathord[i],HIGH);
}
digitalWrite( cathord[3],LOW);
Serial.begin(9600);
pinMode(buttonPin, INPUT);
}
void number_display(int n){
for( int k=0;k<4;k++){ digitalWrite( cathord[k],HIGH); } int nn; // n の各桁の数字を取り出す for(int k=3;k>=0;k–){
nn=n % 10;
digitalWrite( cathord[k],LOW);
for(int i=0;i<7;i++){
digitalWrite( digseg[i], digits[nn] & 1< }
delay(3);
digitalWrite( cathord[k],HIGH);
n=n/10;
}
}
void loop(){
buttonState = digitalRead(buttonPin);
if (sw_red.update() && sw_red.read()==HIGH ){
count++;
}
//digitalWrite(ledPin, sw_red.read() );
// for (int i = 0; i < 10000; i++) {
number_display(count);
Serial.println( buttonState );
// delay(10);
//}
}
ボタン押すとカウントされます。
しかし、、、
Serial.println( buttonState );が無いとカウントしない・・・
なぜ?
ところどころdelay使ってるのでまだまだです。
ついでにカウントダウンタイマー作ってみました。
こちらを参考
http://nekosan0.bake-neko.net/library_timer.html
MsTimer2.hってやつね。
1秒毎にカウントダウン割り込みつかってます。
ボタン押すとリセットされます。
高価なラーメンタイマーができました←
#include // http://www.arduino.cc/playground/Code/Debounce
#include
const int cathord[]={ 13, 10, 9, 7};
const int digseg[]={ 12, 8, 5, 3, 2, 11, 6 };
const int digits[] = {
0b00111111, // 0
0b00000110, // 1
0b01011011, // 2
0b01001111, // 3
0b01100110, // 4
0b01101101, // 5
0b01111101, // 6
0b00100111, // 7
0b01111111, // 8
0b01101111, // 9
};
int count=0;
int buttonState = 0; // variable for reading the pushbutton status
const int buttonPin = 1; // the number of the pushbutton pin
Debounce sw_red = Debounce(20, buttonPin);
void flash() {
count–;
}
void setup(){
for( int i=2;i<=13; i++){
pinMode(i,OUTPUT);
}
for( int i=0;i<4; i++){
digitalWrite( cathord[i],HIGH);
}
digitalWrite( cathord[3],LOW);
Serial.begin(9600);
pinMode(buttonPin, INPUT);
count=180;
MsTimer2::set(1000, flash);
MsTimer2::start();
}
void number_display(int n){
for( int k=0;k<4;k++){ digitalWrite( cathord[k],HIGH); } int nn; // n の各桁の数字を取り出す for(int k=3;k>=0;k–){
nn=n % 10;
digitalWrite( cathord[k],LOW);
for(int i=0;i<7;i++){
digitalWrite( digseg[i], digits[nn] & 1< }
delay(3);
digitalWrite( cathord[k],HIGH);
n=n/10;
}
}
void loop(){
int t;
buttonState = digitalRead(buttonPin);
if (sw_red.update() && sw_red.read()==HIGH ){
count=180;
}
t=(count/60*100)+(count%60);
if(t<0){count=0;}
number_display( t );
Serial.println( count);
}
実はキャラクターLCDも買ってあるんだな。